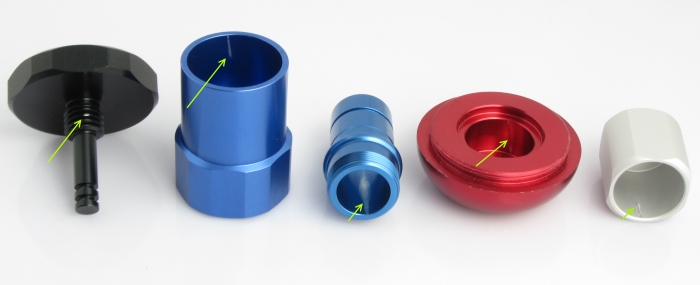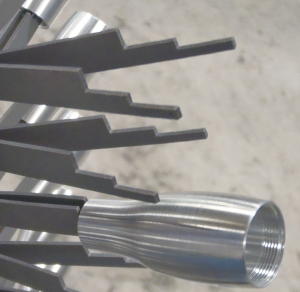
In order to anodize aluminum, the part being anodized must be held (racked) by either a titanium or aluminum rack and then immersed in a sulfuric acid bath. While being immersed, an electrical charge is applied to the part creating the anodic coating on the surface of the part. Rack marks are the small contact points leaving exposed areas on the anodized parts as a result of the process. Electrical contact must be made to each part to be anodized. The more electrical current required, the greater the electrical contact. The size of the contact therefore depends on the anodizing process and the size of the part being anodized.
At least with hardcoat anodizing (Type III) the surface area needed for sufficient current requirements can be pretty substantial depending on the size of your part. Most rack marks are going to be approximately the size of 1-2 pencil lead points in width, if the racks are titanium.
Mil-A-8625F, the Mil spec for anodize allows for contact marks. See Mil-A-8642F sections; 3.13.1 and 6.14 for more information.
Sometimes it is possible to anodize parts without a visible rack mark on the exposed surface. One way is to attache the part to the rack in areas that are not visible on the finished product. Parts that must be racked on exposed surfaces will almost always have some sort of visible rack mark. It’s a matter then of how visible the rack mark is, or looking at it from another viewpoint, how difficult it is to find the rack mark. It sounds like the part you are talking about may not be able to be anodized without a visible rack mark. The larger the part, the more difficult it will be to hold it on a rack with fingers that grip the part and hold it firmly. Even if the rack mark is small, you might not be able to hold the part firmly enough to keep from losing it during processing. The size and weight of the part will also be a factor in how easy or difficult it is to keep it on the rack.
 The type of anodizing process also will determine the size of the rack mark. If a very small part is to receive a relatively thin anodic coating, it may be possible to process it with only a very small rack mark, one that you have to search for to see. If that same part were to require a Type III (hardcoat) anodize, for example, it would most likely have to be held very firmly in order to maintain a good electrical contact during the entire anodizing cycle. This might result in a more visible rack mark. If the parts are to be dyed, especially a dark color, it might be even more difficult to process the parts with no visible mark.
As you can see, there are many variables that come into play in determining the size and visibility of the rack mark. Part size, weight, shape and even the alloy play an important role, as does the type of anodizing process. Obviously, having a variety of rack styles to choose from will also be an important part of the equation for racking parts with as small a visible rack mark as possible. Sometimes a part can be redesigned to make it easier to rack for a very small visible mark. If your part is going to be a long running one, it might be worth a try to see if the part design could be changed enough to make it easier to rack while hiding the marks. In the meantime, the best way to handle this is to denote on your drawings where on your parts the rack marks are acceptable while keeping in mind that there are times when the parts in question simply cannot be racked and successfully anodized without leaving a visible mark.
